Never miss an expiring app registration or credential again.
This guide shows you how to automatically create a Jira ticket from SquaredUp notifications—so alerts become actionable tasks, assigned to the right team. No more lost emails or missed alerts. Follow these steps to streamline your workflow and keep on top of every issue.
See the full process right here - https://www.youtube.com/watch?v=PjwYV-6bewk
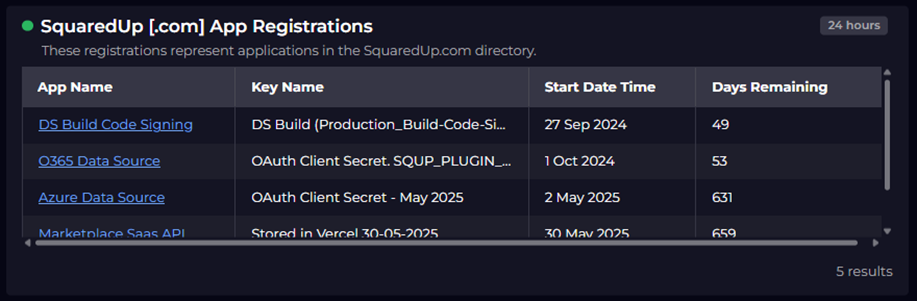
To get started you are going to need a dashboard, a tile and a monitor already setup. Hopefully something that looks like this.
In the Monitors menu option from the left navigation pane, select Add Notification Rule
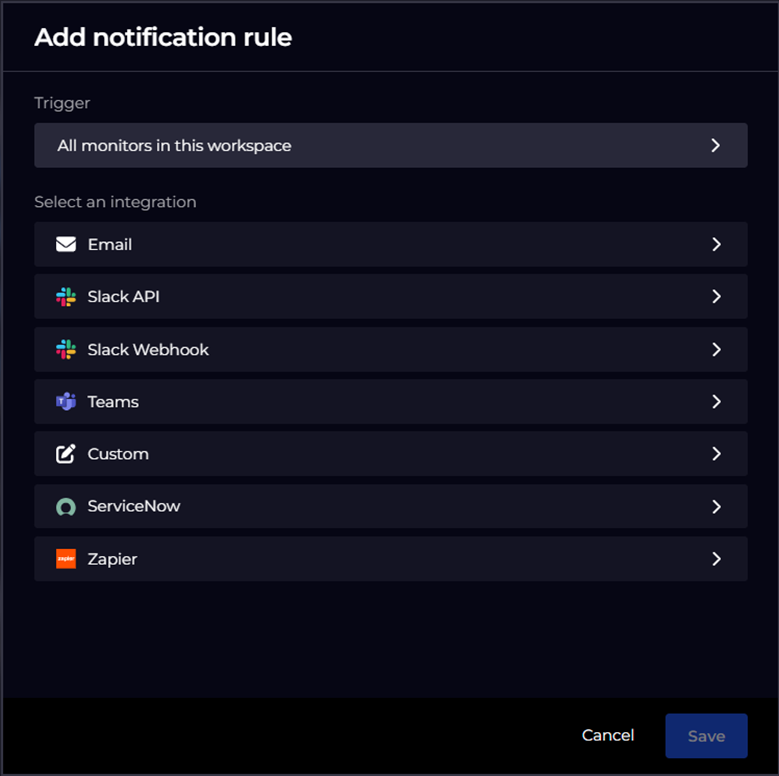
Clicking on the Trigger section, will let you pick the monitor(s) that you want this rule to fire for, it can be all monitors, specific dashboards or a single tile. Select the Custom option (this is a Pro feature) and add a new destination
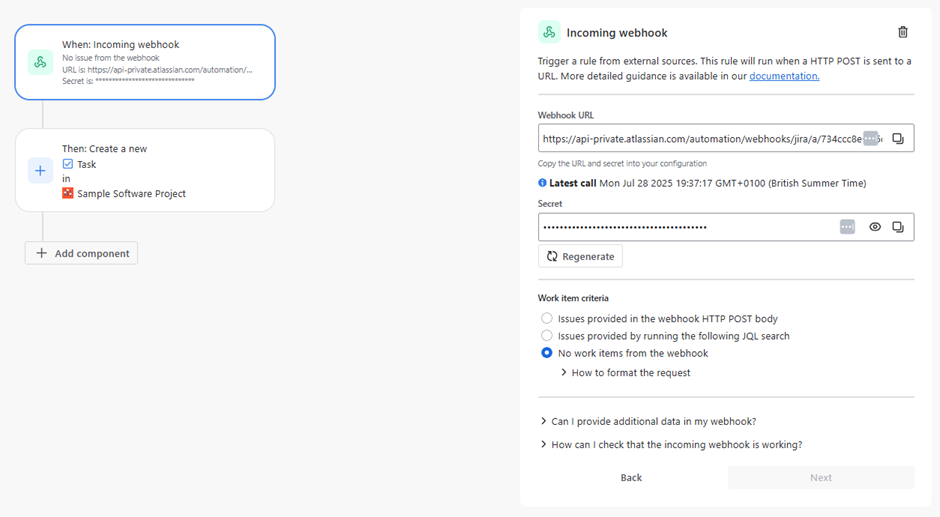
To connect to Jira you will need to create an automation rule for a webhook trigger and a component to create a new work item. The steps for setting that up can be found here - Send alerts to Jira | Atlassian Support
Once you save the automation rule, you will be able to click on the webhook component to get the URL and secret. It is really important you select the radio button No work items from the webhook. This is because the body of our notification will not contain work items, simply information to go into a new work item. In Jira it looks something like this.
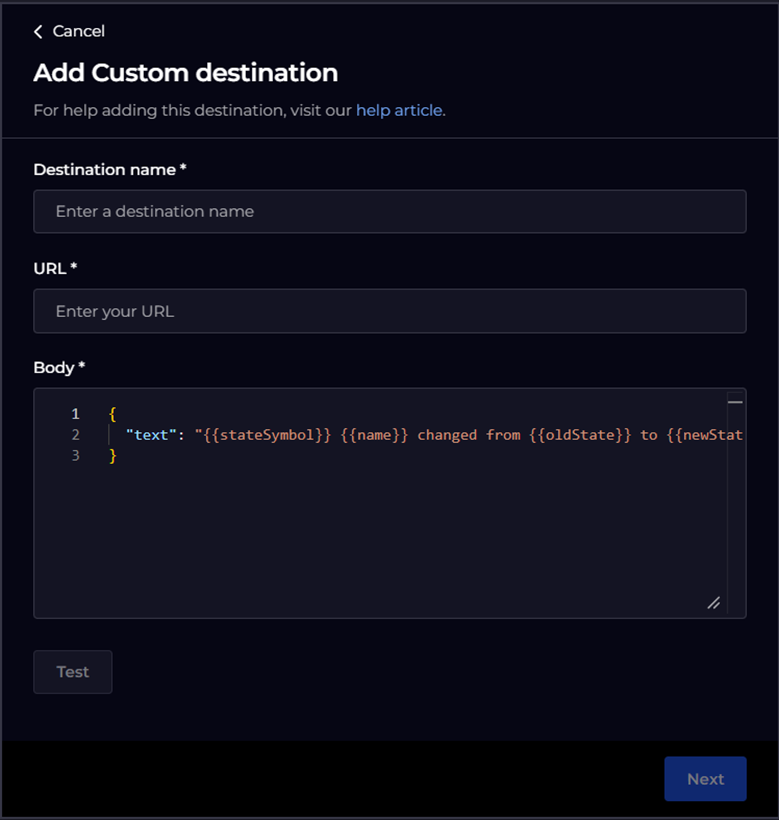
Copy the URL and Secret from Jira into the URL field in SquaredUp. Separating them with a ‘/’.
Now this is where you can get fancy. In the body section of the Custom destination, you can put any information that you want to appear in a Jira field. Give each row a unique row and comma separate them. For instance, you could define the Summary and Description field like this:
{
  "summary": "{{name}} - App registration needs renewing",
  "description": "{{stateSymbol}} {{name}} changed from {{oldState}} to {{newState}}. \n{{#stateReason}}{{stateReason}}. \n{{/stateReason}}View in SquaredUp: {{{link}}}"
}
In Jira you can then use smart tags to apply those fields. So in this example it would look something like this.

This is a simple example using a task and only setting a couple of fields, but you can use the full power of Jira automation to add further conditions and route these new tickets to different teams and populate other fields. Save the rule again and return to SquaredUp.
You should now have a Name, URL and Body for your notification. Click the Test button in SquaredUp, this will send a test notification and create a test work item in Jira, check the audit log for a success message. It won’t have the specific details you put in the body, they will appear on a real notification. That’ it, you are good to go!
Top tip: You can add another notification with an ‘email’ destination so you will know when the monitor has triggered and the work item will have been created.